Identify & Scrape
Filenames give you titles. Identify gives you everything else: posters, backdrops, descriptions, performers, studios, tags, episode breakdowns, ratings, external IDs.
This page covers the workflow end-to-end — picking providers, running identifies, reviewing candidates in the cascade drawer, and accepting results.
What is what
Three concepts are easy to mix up.
| Concept | What it is | Example |
|---|---|---|
| Plugin | A native Obscura provider with a manifest, capabilities, and an execution envelope. Written in TypeScript or Python. | tmdb, tvdb, youtube, musicbrainz |
| Stash-compat scraper | A YAML-defined Stash community scraper, wrapped by Obscura's adapter. | Most of the long tail of porn-site scrapers |
| StashBox endpoint | A GraphQL fingerprint-based lookup service (PHash / OSHash / MD5). | stashdb.org, theporndb.net |
All three feed into the same identify engine and the same Accept / Reject UI.
The Identify hub (/identify)
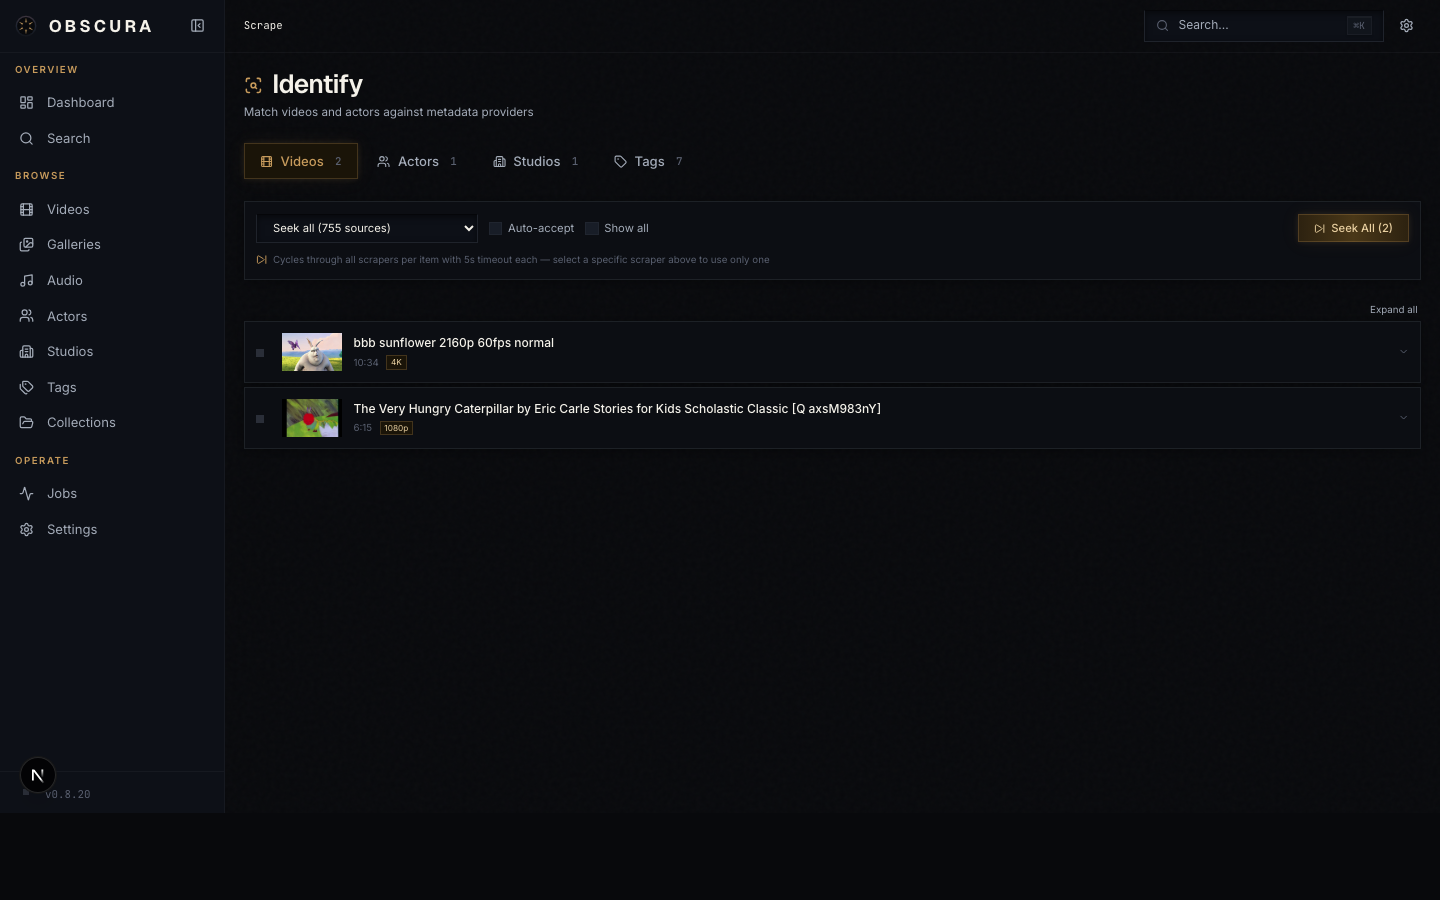
Open Identify in the sidebar to land on the hub. It's a tabbed dashboard, one tab per media type:
- Videos — match individual scenes/episodes/movies to remote metadata
- Series — identify a series and cascade down through seasons and episodes
- Galleries, Images
- Audio Libraries, Audio Tracks
- Performers, Studios, Tags
- pHashes — image fingerprint clustering
Each tab has a list of unidentified or pending entities, a provider selector, and the run / accept controls.
The basic flow (per tab)
- Pick a provider from the dropdown at the top.
- Click Run to fetch candidates for every row.
- Review each row — accept the best match, or reject if none are right.
- Accept all to commit everything still pending.
The provider list is filtered by capability (you only see providers that can handle this entity type) and by NSFW mode (SFW providers in SFW mode, etc.).
Per-row controls
| Control | Effect |
|---|---|
| Accept | Apply the candidate to the entity. Creates missing performers, tags, studios; downloads images to local cache. |
| Reject | Mark the candidate as wrong; row stays pending so you can pick another. |
| Dismiss | Skip this row entirely (won't be re-suggested next run unless you re-enable). |
| Auto-accept | Toggle to auto-apply rows that returned exactly one candidate. |
Field masks
Every accepted result is a diff, not a replace. The cascade drawer shows per-field checkboxes — title, date, details, performers, tags, studio, images — so you can keep manual edits in some fields while pulling fresh data into others.
The cascade drawer (Series identify)
The most powerful flow is Series identify, which finds a series in TVDB / TMDB and cascades the result down through every season and episode in one pass.
Open the Series tab, pick a provider, click Run, and accept a series row. The cascade drawer slides in from the right.
The drawer is structured top-down:
- Series header — poster picker, backdrop picker, logo picker, title, overview, status. Each image picker shows multiple candidates with width/language/source so you can choose the one you want.
- Candidate Picker — when the provider returned more than one possible series, you pick the right one. Re-runs the cascade with the chosen external ID.
- Season sections (collapsible) — per-season poster picker, season metadata, plus an inline list of episodes.
- Episode rows — per-episode title, overview, air date, still image picker. Unmatched episodes (where the provider couldn't find a counterpart for a local file) are flagged.
- Per-field checkboxes — at the series, season, and episode level so you can decide exactly what gets written.
- Apply cascade — the footer button. Walks the tree, creates missing performers / tags / studios, downloads chosen images to the local cache, and marks every applied row as
acceptedinscrape_results.
Why "cascade"
In the database, scrape_results.cascadeParentId links a child episode result to the series-level result that produced it. Accepting at the series level commits the whole tree as one transaction; you don't have to chase episodes one by one.
Plugin management (/plugins)
The Identify dropdown only shows providers you've installed. The plugins page is where you manage them.
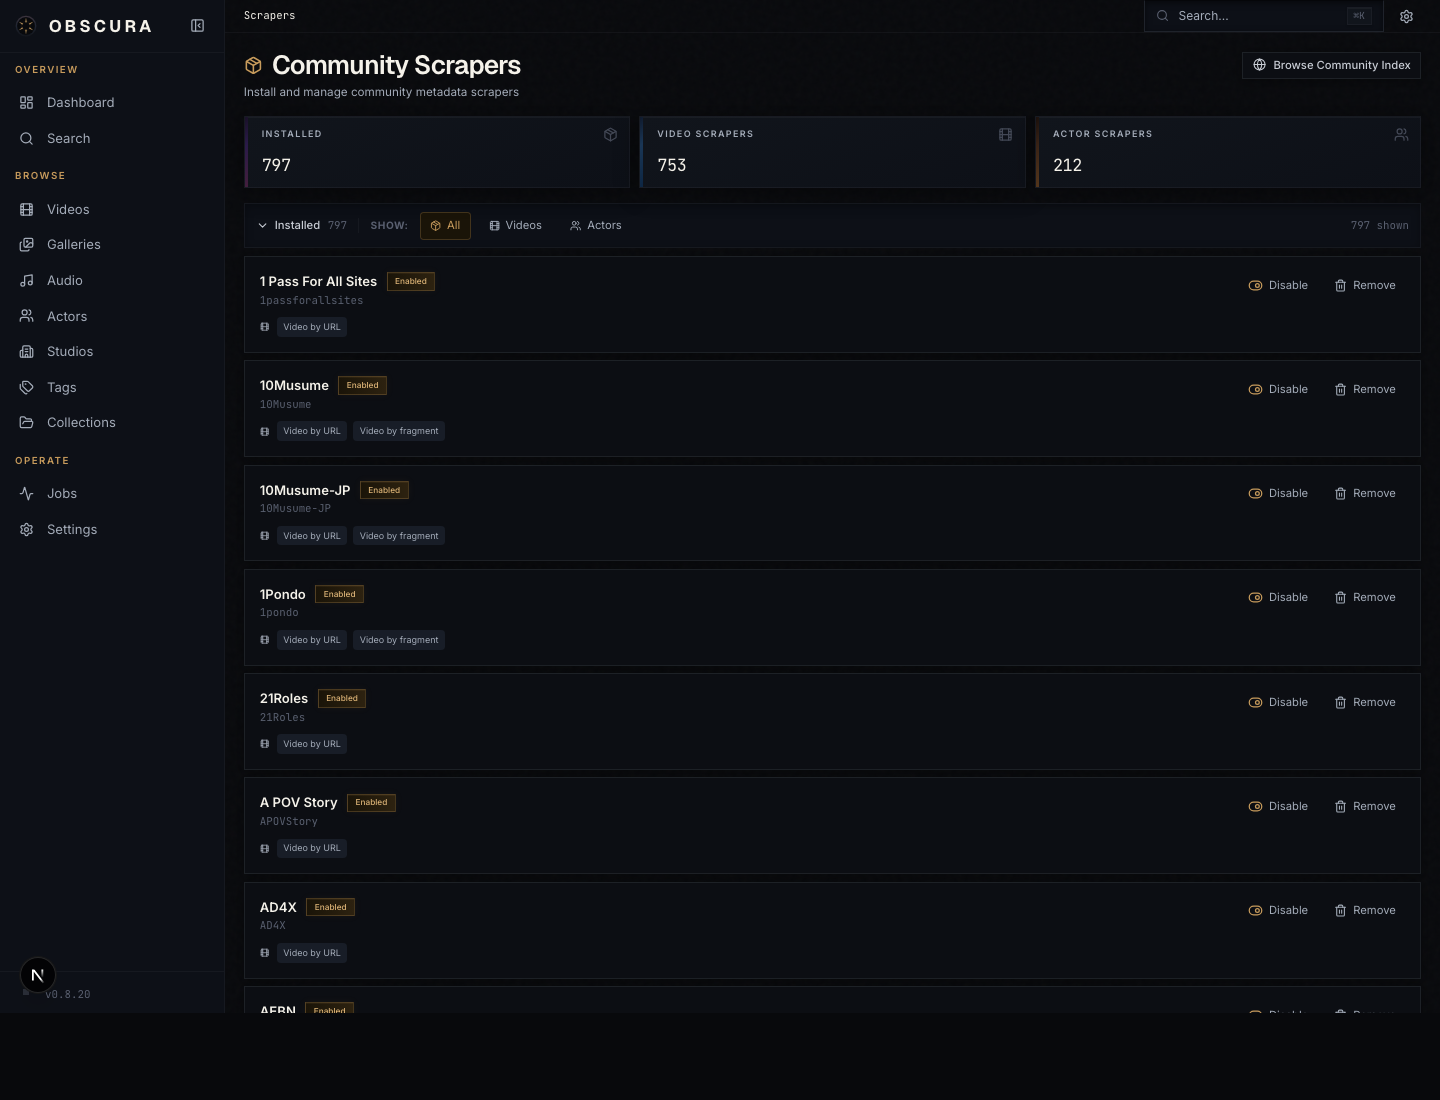
Tabs:
- Installed — plugins and scrapers currently active. Toggle enable/disable, set API keys, check for updates, uninstall.
- Obscura Index — first-party plugin registry (TMDB, TVDB, YouTube, MusicBrainz). One-click install.
- Stash Community — long-tail YAML scrapers, also installed in one click.
- StashBox — endpoint configuration (name, URL, API key) for fingerprint lookup.
Installing a plugin
- Open the Obscura Index tab.
- Find the plugin you want.
- Click Install. Obscura downloads the package, verifies its checksum, and writes it to the on-disk plugin directory. The new plugin appears under Installed.
Setting an API key
Most metadata providers need credentials.
- Open Installed and find the plugin.
- Click into its row to expand the auth fields. Each field shows its label and a link to where you get the credential (e.g.
https://www.themoviedb.org/settings/api). - Paste the key and save.
Credentials are stored encrypted in the plugin_auth table and only decrypted in-memory at the moment of plugin execution. They round-trip cleanly across container recreations as long as /data is preserved.
Updating
Click Check for updates at the top of the Installed tab. Plugins with newer versions in the registry get an Update button next to them. Existing API keys and settings are preserved across updates.
StashBox endpoints
StashBox is a separate concept from plugins. It uses fingerprints (perceptual hash, OpenSubtitles hash, MD5) instead of names or URLs to identify content, and it has a contribute-back protocol — see pHash Contribution for the details.
Configure endpoints in Plugins → StashBox:
- Name — friendly label
- Endpoint URL — the GraphQL endpoint, e.g.
https://stashdb.org/graphql - API key — your account's API key
Click Test to verify connectivity, then Save. Enabled endpoints appear in the provider picker on the Videos identify tab.
NSFW filtering
The provider picker, like everything else in the UI, respects the current NSFW mode (Settings → Content Visibility):
- Off — SFW-only providers visible; NSFW providers hidden.
- Show — every provider visible.
- LAN auto-enable — Show on LAN, Off elsewhere.
Plugin manifests declare isNsfw: true for adult-oriented providers; StashBox endpoints and Stash-compat scrapers are NSFW-by-default since they're built around adult-content metadata. See NSFW mode in Settings.
What happens when you Accept
When you click Accept on a row (or Apply cascade on a drawer), the following happens server-side:
- The
scrape_resultsrow'sstatusbecomesaccepted. - Performers, tags, and studios mentioned in the result are created if missing (by name; tags deduplicate case-insensitively).
- Selected images are downloaded from their URLs to
/data/cache/metadata/and linked to the entity. - The chosen fields are written to the entity row(s). For a cascade, this is a series of writes wrapped in one transaction.
- External IDs (TVDB ID, TMDB ID, etc.) are stored in
external_idsso future identifies can dedupe.
Your edits in the UI are not overwritten by future identify passes unless you explicitly re-accept a result.
Bulk identify on a list page
You don't have to use the Identify hub. Most detail pages and list pages have an Identify button that scopes to the current item or selection. The button opens the same provider picker; the cascade drawer behavior is identical.